My idea was really simple: I would make a circuit that would fully discharge each of the batteries while measuring how much energy it produced (displayed in Joules and in Watt-Hours. I had an Arduino and an LCD panel left over from a different project so I thought I’d make a standalone unit. As the design evolved, I let two additional features creep in:
Add a temperature sensor to track ambient temperature during the test since that certainly affects battery capacity.
Add a USB logging capability so that I could capture all the data to plot terminal voltage as the battery discharges.
Note: This was never intended to be a scientific instrument to measure how long a battery would power your circuit - it’s designed to provide a relative comparison of different batteries using a similar load.
The Design
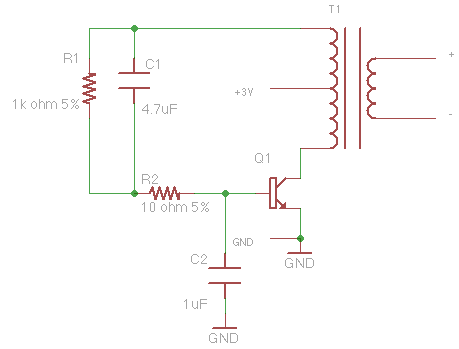
The circuit works by measuring the voltage across a fixed load every second until the voltage drops to less than 0.2V. For simplicity, I used a resistive load (the original plan was to use a 4.7R resistor but I didn’t have any high power resistors to hand so I used 4 22R resistors in parallel instead giving me an effective load of 5.5R. Here’s the final circuit: This case from adafruit ended up being perfect because it already has cutouts and standoffs for the arduino and the LCD. All that was left was to add a little bit of stripboard to hold the extra components. Note that the whole circuit is powered from the USB connection (or the DC jack) - all the power from the battery is consumed by the load resistors.
The Software
When the unit resets, it waits until a battery is connected before starting any measurements. Once it detects a battery, it measures the temperature and voltage once a second and displays the cumulative energy in Joules and Watt-Hours on the display. It also logs the readings to the USB port once per second. You can capture these to a text file with any terminal emulator but I found the easiest thing to do was to use screen:
1
$ screen -L /dev/tty.usbmodemfd131 9600
Once the voltage drops below 0.2V, it will stop measuring and display the total energy produced. If you’re using screen to capture the data, quit it with ^A ^K and rename the logfile to something more memorable:
1
$ mv screenlog.0 duracell-simply.csv
The CSV file has a line for every second of the test. For graphing, it’s easier to make a version of the file with an entry sampled every minute:
So far, I’ve captured the data from 10 brands of alkaline battery. In each case, I took 1 battery from the pack and measured its capacity. Obviously, it would be better to take a selection of each and average the results but I didn’t want to waste all my batteries on the test.
In most cases, I bought the batteries in packs of 4. It’s interesting to take the cost of each battery (pack cost / pack size) and combine that with the measured capacity:
This lets us compare each of the batteries in terms of the cost per Watt-Hour (which is really all you should care about when buying them). Obviously, lower is better:
There’s a difference of over 9X between the best value (RS Power Ultra) and the worst value (Panasonic Evolta).
I’ve posted the schematic, source code and results files on GitHub. If you build one, please share your results…
-การใช้งานก็เพียงเลือกว่าต้องการวัดว่า C หรือ L วัด C สามารถวัดได้โดยเลือกสวิตช์ไปที่ C แล้วนำ C ที่ไม่ทราบค่ามาวัด วัด L สามารถวัดได้โดยช็อตสายวัดแล้วเลือกสวิตช์ไปที่ L แล้วนำ L ที่ไม่ทราบค่ามาวัด -ขั้นตอนการปรับแต่ง-ผมปรับให้วัดได้แม่นยำขึ้น โดยเดิมๆก็วัดค่าได้ใกล้เคียงมาก
Check that you have put all the components in the right places.
Check that you have soldered every lead.
Double check the PIC orientation, the diode and the 7805.
Don't forget - the PIC (as purchased) isn't programmed. You gotta load the LC Meter code into it before it will work.
Apply power carefully. If possible, use a variable regulated supply for the first try. Measure the supply current while gradually increasing the voltage. The current should be below 20mA. The prototype drew just 8mA. If you see nothing on the display and everything else checks out OK, try adjusting the Contrast trimpot. If it is set too far off, you will see nothing. The display should briefly show the word Calibrating, then C=0.0pF (or some other capacitance up to +/- 10pF ).
Allow several minutes "warm-up", then press the "zero" button to force a re-calibration. The display should now show C=0.0pF.
Connect your "standard" capacitor. The LC meter should read somewhere near its value (with up to +/- 10% error).
To raise the indicated capacitance, join the links marked "4" on the diagram below. To lower the indicated capacitance, join the links marked "3" on the diagram below. When the indicated value is "close enough" to the standard, remove the link. The PIC will remember the calibration. You can repeat this as many times as you like (up to 10,000,000 times I think before you wear out the PIC).
If the meter misbehaves, you can use the links "1" & "2" to check the oscillator frequency. Apply link "2" to check the free running frequency "F1" of the oscillator. This should be shown as 00050000 +/- 10%. If this reading is too high (near 00065535), the meter may go into "numerical overflow" and give you an error message. If the reading is too low (say below 00040000), you will lose some accuracy. Apply link "1" to check the "calibration" frequency "F2". This should be near 71% +/- 5% of the "F1" reading that you get by applying link "2".
Experts may like to adjust the inductor value to raise F1 to near 00060000 to obtain maximum resolution from the meter. An "L" value of 82uH is preferred instead of the specified 100uH (but you can't buy 82uH inductors in Bendigo).
If the meter shows near 00000000 for F1 and or F2, then recheck the wiring around the L/C switch, 'cos it sounds like your oscillator has stopped.
The Inductance measuring function is automatically calibrated when you calibrate the capacitance function. All the testing required is to check that the meter can be "zeroed" with the terminals shorted together.



 My idea was really simple: I would make a circuit that would fully discharge each of the batteries while measuring how much energy it produced (displayed in Joules and in Watt-Hours. I had an Arduino and an LCD panel left over from a different project so I thought I’d make a standalone unit. As the design evolved, I let two additional features creep in:
 This case from adafruit ended up being perfect because it already has cutouts and standoffs for the arduino and the LCD. All that was left was to add a little bit of stripboard to hold the extra components. Note that the whole circuit is powered from the USB connection (or the DC jack) - all the power from the battery is consumed by the load resistors.
 It also logs the readings to the USB port once per second. You can capture these to a text file with any terminal emulator but I found the easiest thing to do was to use screen:


